


How to Use a Handheld Vacuum for Bed Cleaning Effectively
Your bed is one of the most used surfaces in your home. You spend roughly a third of your life on it. However, it is also one of the most overlooked surfaces when it comes to cleaning. Dust mites, dead skin cells, pet dander, and crumbs all accumulate in your mattress and bedding over time. The result? A sleeping environment that can irritate allergies and disrupt your rest.
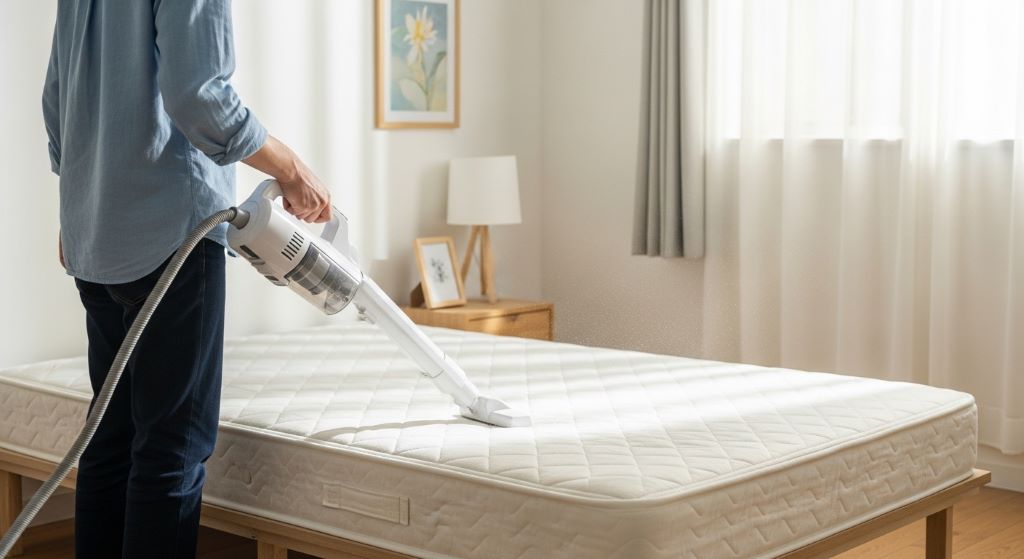
A handheld vacuum changes all of that. It is compact, easy to use, and surprisingly effective. Additionally, a portable vacuum gives you the freedom to clean your bed thoroughly without dragging out a heavy upright machine. This guide will show you exactly how to use one to get the best results every single time.
Why Your Bed Needs Regular Vacuuming
Many people wash their sheets regularly but never clean the mattress itself. This is a common mistake. Sheets protect your mattress to some degree, but particles still work their way through. Dust mites, in particular, thrive deep inside mattress fibers where normal cleaning cannot reach.
Dust mites are microscopic creatures that feed on shed skin cells. They are present in virtually every home. Their waste products are a leading cause of allergic reactions, including sneezing, runny noses, and itchy eyes. People with asthma are especially sensitive to them.
Therefore, vacuuming your bed is not just about tidiness. It is a genuine health measure. Regular bed vacuuming reduces allergen levels, improves air quality around your sleeping area, and extends the life of your mattress. It is a simple habit with significant benefits.
Choosing the Right Handheld Vacuum for Your Bed
Not all handheld vacuums are created equal. Choosing the right one makes a noticeable difference in how well you can clean your bed. Here are the most important features to consider before you buy.
Suction Power
Suction power is the most critical factor. A vacuum with weak suction will not pull embedded particles out of dense mattress fabric. Look for models with at least 15 to 20 watts of input power, or check for mentions of strong suction in verified user reviews.
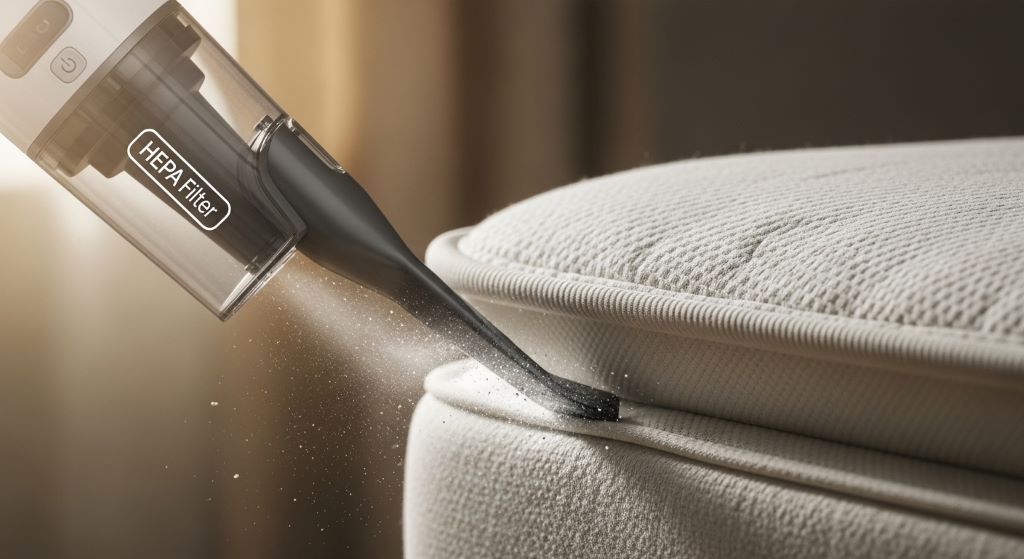
HEPA Filtration
A HEPA filter traps tiny particles rather than releasing them back into the air. This is especially important for allergy sufferers. Many standard vacuums capture debris but expel fine allergens through their exhaust. A HEPA-equipped model ensures those particles stay captured.
UV-C Light Technology
Some handheld vacuums designed specifically for bedding include a UV-C light. This ultraviolet light kills dust mites and bacteria on contact. It adds a layer of sanitation that suction alone cannot provide. However, these models tend to cost a bit more. For most households, they are worth the investment.
Weight and Ergonomics
A heavy vacuum becomes tiring to use over a large mattress surface. Look for a model that weighs under two kilograms. Additionally, the handle should feel comfortable and allow a natural wrist angle as you move across the bed.
Battery Life
Cordless models offer greater freedom of movement. However, check the runtime. A battery that lasts only ten minutes may not be enough to vacuum an entire mattress and set of pillows. Aim for at least twenty minutes of runtime per charge.
Getting Your Bed Ready for Vacuuming
Preparation is an often overlooked step. Taking a few minutes to prepare your bed before you switch on the vacuum makes the entire process more effective.
First, strip all bedding from the mattress. Remove your sheets, pillowcases, duvet cover, and any mattress topper. These should go straight into the laundry. Washing bedding at 60 degrees Celsius or higher kills dust mites that have settled into the fabric.
Next, give the bare mattress a moment to air out. If you can open a window to let fresh air circulate, even better. This helps surface moisture evaporate, which makes dry debris easier to lift with suction.
Additionally, check the vacuum’s dustbin and filter before you start. An already-full bin reduces suction power. A clogged filter can overheat the motor. Starting with a clean vacuum ensures the best performance from the first stroke.
A Step-by-Step Guide to Vacuuming Your Mattress
Once your bed is stripped and your vacuum is ready, follow this process for a thorough clean.
Step One: Start at the Top and Work Down
Begin at the head of the mattress. Move the vacuum in slow, overlapping strokes toward the foot. Working from top to bottom ensures that any dislodged particles fall downward and get captured as you go, rather than being pushed back over already-cleaned areas.
Step Two: Use Slow, Deliberate Strokes
Speed is the enemy of effective mattress vacuuming. Moving too quickly does not give the suction enough time to pull particles out of the fabric. Slow, deliberate passes of about ten centimeters per second are far more effective. Think of it as painting a wall, not scrubbing a floor.
Step Three: Overlap Each Pass
Each stroke should overlap the previous one by about half the width of the vacuum head. This overlapping technique ensures no strip of mattress is missed. It is a simple habit that significantly improves coverage.
Step Four: Pay Extra Attention to Seams and Edges
Dust and debris collect most heavily in the seams, tufts, and edges of a mattress. Use a crevice tool attachment if your vacuum includes one. Run it along every seam and around the perimeter of the mattress. This is where the majority of dust mite populations tend to concentrate.
Step Five: Flip and Repeat
If your mattress is double-sided, flip it and repeat the process on the other side. Even single-sided mattresses benefit from having their underside vacuumed occasionally. This side collects less body debris but can accumulate dust from the bed frame or floor.
Step Six: Do Not Forget the Pillows
Pillows are a major reservoir of allergens. Run the handheld vacuum over every surface of each pillow. Use the same slow, overlapping technique. If your pillows are old or no longer feel supportive, this is also a good time to consider replacing them.
Dealing with Specific Bed Cleaning Challenges
Different situations call for slightly different approaches. Here is how to handle some common scenarios.
Pet Hair
Pet hair is one of the trickiest things to remove from bedding. It weaves itself into fabric fibers and resists suction. Before vacuuming, use a rubber glove or a damp rubber brush to gather pet hair into clumps. Suction then picks up these clumps far more easily. Additionally, check that your vacuum has a motorized brush roll, as this is particularly effective against pet hair.
Crumbs and Food Debris
Crumbs are relatively simple to remove, but they can scratch mattress fabric if brushed roughly. Use a flat nozzle attachment and let the suction do the work. Avoid scrubbing or pressing the nozzle hard into the surface.
Fine Dust and Allergens
For fine dust, the key is patience. Make multiple passes over the same area. Additionally, if your vacuum has a vibration or tapping feature, use it. This function agitates the mattress surface and loosens deeply embedded particles before suction captures them.
Combining Vacuuming with Other Bed Cleaning Methods
Vacuuming is highly effective on its own. However, combining it with a few other methods creates a truly clean sleeping environment.
Baking soda is a natural deodorizer. After vacuuming, sprinkle a light layer of baking soda over the mattress surface. Leave it for fifteen to thirty minutes, then vacuum it up. The baking soda absorbs odors and draws out a little additional moisture. Your mattress will smell noticeably fresher afterward.
Steam cleaning is another excellent complement to vacuuming. A handheld steam cleaner uses hot vapor to kill bacteria and dust mites deep within the mattress. However, always allow the mattress to dry completely before replacing your bedding. A damp mattress encourages mold growth.
Essential oils can also be added to your routine. A few drops of lavender or tea tree oil diluted in water and lightly misted over the mattress adds a pleasant scent and mild antibacterial effect. Use this sparingly to avoid over-saturating the fabric.
How Often Should You Vacuum Your Bed?
The frequency of bed vacuuming depends on your household and health needs. Here is a general guide:
- Every one to two weeks is ideal for most households, especially those with allergy sufferers or pets.
- Once a month is a reasonable minimum for households with no allergy concerns and no pets.
- After any illness, vacuum the mattress and all bedding thoroughly to remove any remaining germs or debris.
- Seasonally, do a deeper clean that includes vacuuming the bed frame, slats, and headboard as well.
Developing a consistent schedule is the most important thing. Even a monthly vacuum is infinitely better than never vacuuming your mattress at all.
Quick Cleaning Solutions for Busy Households
Life gets busy. Not every cleaning session has to be a deep clean. Quick cleaning solutions using a handheld vacuum can maintain hygiene between full sessions.
A five-minute surface pass over the mattress after changing sheets takes very little effort. It removes the most recent layer of shed skin and dust before it has a chance to settle deeper. This regular light touch dramatically reduces how much effort the monthly deep clean requires.
Therefore, do not skip the quick passes because you do not have time for a full session. A little maintenance goes a long way. It keeps your sleeping environment consistently cleaner without demanding large blocks of time.
Maintaining Your Handheld Vacuum for Peak Performance
A vacuum that is not maintained will not perform well. Fortunately, handheld vacuum maintenance is simple and takes only a few minutes.
- Empty the dustbin after every use. A full bin chokes suction and forces the motor to work harder.
- Rinse or replace filters regularly. Most manufacturers recommend cleaning filters every month and replacing them every six to twelve months.
- Check for blockages in the nozzle and hose. A partial blockage dramatically reduces suction power.
- Store the vacuum in a dry place. Moisture can damage the motor and encourage mold inside the unit.
- Charge the battery properly. Avoid leaving it fully discharged for extended periods, as this shortens battery lifespan.
A well-maintained portable vacuum will serve you effectively for years. Additionally, it will consistently deliver the suction power you need to keep your bed truly clean.
Conclusion
Keeping your bed clean is one of the simplest things you can do to improve your health and sleep quality. A handheld vacuum makes the job easy, fast, and effective. You do not need specialist knowledge or expensive equipment to see real results.
Choose a vacuum with strong suction, a HEPA filter, and a comfortable weight. Prepare your bed by stripping all bedding first. Use slow, overlapping strokes and pay careful attention to seams and edges. Combine vacuuming with baking soda treatments and occasional steam cleaning for the deepest results.
Vacuum your bed every one to two weeks for optimal hygiene, and do quick passes in between to maintain freshness. Keep your vacuum clean and well-maintained so it is always ready when you need it. With these habits in place, you will sleep better knowing your bed is genuinely clean, not just neatly made.
Frequently Asked Questions
1. Can a regular handheld vacuum remove dust mites from a mattress?
A regular handheld vacuum can remove a significant number of dust mites and their waste products from the surface of a mattress. However, for deeper penetration, models with a vibration or beating function are more effective. Pairing vacuuming with UV-C light treatment provides the most thorough dust mite removal available without professional cleaning.
2. How long does it take to vacuum a mattress properly?
A thorough mattress vacuum typically takes between ten and twenty minutes for a standard double or queen-size bed. This includes the top surface, sides, and seams. Larger mattresses or those with heavy soiling may take a little longer. A quick maintenance pass takes around five minutes and is perfectly adequate between deep-clean sessions.
3. Is it safe to vacuum memory foam mattresses?
Yes, it is safe to vacuum memory foam mattresses. However, use a low-suction setting if your vacuum has one, and avoid pressing the nozzle too hard into the surface. Memory foam is more delicate than spring or hybrid mattresses. Use a soft upholstery attachment rather than a stiff brush to prevent surface damage.
4. What is the best attachment for vacuuming a bed?
The upholstery attachment is the most versatile for mattress surfaces. It covers a wide area and is gentle on fabric. Additionally, a crevice tool is essential for seams, edges, and tufted areas where debris accumulates most heavily. If your vacuum came with a motorized mini brush, use it on the flat surface for best results on pet hair.
5. How do I know if my handheld vacuum is powerful enough for mattress cleaning?
A simple test is to vacuum a small patch of your mattress and then press a piece of white tape over the same area. Peel it up and examine how much debris remains. If significant debris appears on the tape, your vacuum may not be delivering enough suction for deep mattress cleaning. In that case, consider a model specifically designed for bedding and upholstery, which will offer more targeted quick cleaning solutions for your home.
Related Topics:
How to Get Rid of Domicile Cup Fungus in Bathroom
Homeowner Tips: Choosing the Right Window Treatment for Home