




Leak Under Sink: Causes, Fixes, and How to Stop the Damage
A leak under sink usually announces itself as a soft drip you hear at night, a warped cabinet floor, or a musty smell you cannot place. By then, water has often been pooling for days. The good news is that most under-sink leaks start at a handful of predictable spots, and many are cheap to fix.
Quick answer: Shut off the water supply valves, dry everything thoroughly, and trace the source with a flashlight and a dry paper towel. Most leaks come from loose supply connections, worn P-traps, failed gaskets, or a cracked drain flange. Tighten what you can, replace worn parts the same day, and call a plumber if water is coming from the wall or cabinet structure.
This guide explains what an under-sink leak actually involves, why it matters more than most people assume, and which habits prevent the next one. You will finish knowing how to diagnose the common culprits and when to hand the job to a professional.
What is leak under sink?
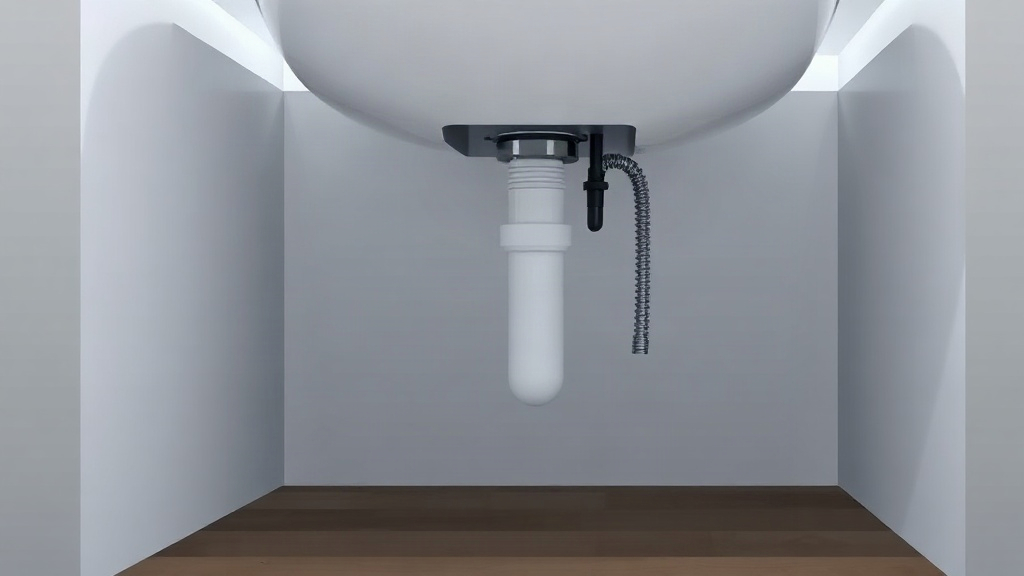
A leak under sink is any unintended water escape within the cabinet space beneath a basin. That space is crowded: two supply lines bring pressurized water in, a drain carries wastewater out, and a trap holds a small amount of water as a seal. Each connection is a potential failure point.
Leaks fall into two broad categories, and they behave very differently.
Pressurized supply leaks come from the hot and cold lines and their valves. These run constantly, so even a pinhole sprays water every second the valve is open. A supply leak can soak a cabinet in hours. You will often see fine mist on the pipes or a steady drip from the fitting nut.
Drain leaks only appear when water flows. The P-trap, tailpiece, and drain flange carry water only during use, so a loose slip nut may stay invisible until someone runs the tap. This is why many people find a puddle only after doing dishes.
The parts most likely to fail
Most under-sink leaks trace back to a short list of components:
- Supply line fittings, especially where the braided hose meets the shutoff valve
- The P-trap and its slip nuts, which loosen as the plastic expands and contracts
- The drain flange and basket strainer, where plumber’s putty or a gasket breaks down
- The garbage disposal housing and its mounting ring, on kitchens that have one
- The shutoff valve itself, which can weep from the packing nut
- An old, brittle supply hose that bulges before it bursts
Age and water quality both matter. Rubber hoses stiffen over time, and hard water leaves mineral deposits that stress seals. A pressure spike from the municipal supply can finish off a fitting that was already weak.
Here is a quick way to tell a supply leak from a drain leak. Dry every pipe and fitting with a paper towel, then watch for a minute without running water. If moisture reappears, it is a supply problem. If nothing shows, run the tap for 30 seconds and check again. Moisture now points to the drain.
A slow drain leak can dry between uses and leave only a chalky mineral stain. Never treat a white crust on a trap as harmless cosmetic residue; it is usually the signature of a leak that has been going for weeks.
Takeaway: identify the category of leak first, because a supply fix and a drain fix follow different steps.
Why leak under sink matters
It is tempting to slide a bucket underneath and forget about it. That approach costs far more than a repair. Cabinet flooring is usually particleboard or thin plywood, and both swell once they absorb water. Swollen board does not return to shape, so a small leak can permanently ruin the base of a cabinet.
The damage rarely stays under the sink. Water wicks along the cabinet floor and into adjacent units. It creeps behind toe kicks and into subflooring. In a second-floor bathroom, it can travel into the ceiling below before anyone notices. Repairs for rot and water damage often dwarf the cost of the original fix, which may be a two-dollar washer.
Mold is a serious second concern. A damp cabinet with little airflow is close to ideal for mold growth. Spores can spread to dishes, cleaning supplies, and the surrounding room. People with allergies or asthma may notice symptoms before they find the source. A musty odor under the sink is a warning, not a personality trait of old cabinets.
Hidden costs and safety risks
There are practical risks beyond damage:
- Slip hazard. Water seeping onto a kitchen or bathroom floor creates a slick surface, especially on tile.
- Electrical danger. Many kitchens and bathrooms have outlets or disposal wiring near the cabinet. Water plus electricity is a genuine hazard, not a minor annoyance.
- Higher water bills. A steady drip wastes water continuously and shows up on your bill.
- Pest attraction. Damp wood and standing water draw insects and occasionally rodents.
Renters and homeowners face different consequences. A renter should report a leak immediately in writing, because delaying notice can shift responsibility for damage. A homeowner carries the repair cost directly and should check whether their policy covers sudden versus gradual leaks, since insurers often treat them differently.
If you see water near an outlet, a disposal switch, or a dishwasher connection, switch off the breaker for that circuit before you reach into the cabinet.
The stakes are highest in slow, unnoticed leaks. A fast spray is obvious and gets fixed. A hairline drip behind a trap can run for months and quietly destroy a cabinet and part of a floor.
Takeaway: treat every under-sink drip as urgent, because hidden water damage and mold are the expensive part of the problem.
Best practices
Good habits prevent most under-sink leaks and make the leaks that do happen cheap to fix. Start with knowing where your shutoff valves are. Every adult in the home should be able to close the hot and cold stops under each sink in under a minute. If a valve is stiff or seized, replace it now rather than during an emergency.
Build an inspection routine
Check the cabinet under each sink every few months. Shine a flashlight along the supply lines, traps, and the base of the cabinet. Run the tap for a minute and watch each joint. Wipe a dry paper towel along the bottom of the trap and around fittings; any moisture means a problem. This five-minute check catches most leaks before they spread.
When you inspect, look for these early signals:
- White or green crust on fittings
- Water stains or soft spots on the cabinet floor
- A bulge or fraying on a braided supply hose
- Loose slip nuts that turn by hand
- A drain that drains slowly, suggesting a partial clog pressing on joints
Replace parts before they fail
Supply hoses have a limited lifespan. Braided stainless lines generally outlast plain rubber, and both should be replaced if they feel stiff, show rust, or are older than about a decade. Swap the shutoff valves at the same time if they are stiff. A small upgrade now avoids an emergency later.
Seal drain connections correctly. Hand-tighten slip nuts and add a quarter turn with pliers, not a full crank. Overtightening cracks plastic and crushes washers. Use fresh gaskets and the right sealant for the job, and follow the manufacturer’s instructions rather than improvising.
Control water pressure and drain clogs
High water pressure stresses every fitting. A pressure-reducing valve on the main line can protect the whole system if your home runs high. Clear slow drains early, because standing water and chemical drain cleaners both stress trap joints. A plunger or drain snake is gentler than caustic cleaners.
Keep a small under-sink kit: a roll of paper towels, a flashlight, spare washers, and a bucket. When a leak appears, you can contain it in seconds instead of hunting for supplies.
Takeaway: routine inspection and early replacement of worn hoses and valves prevent the vast majority of under-sink leaks.
Common mistakes to avoid
The wrong response to a leak often causes more damage than the leak itself. These are the errors that show up again and again.
Tightening everything without finding the source
People often grab a wrench and crank every nut in sight. That can crack a plastic trap or strip a fitting, turning a small drip into a real break. Diagnose first, then fix the one joint that is actually leaking. Water travels along pipes, so the wet spot is not always the source.
Ignoring the leak because it is slow
A drip that only appears during use feels minor. Over weeks, it rots cabinet board and feeds mold. Treat any recurring moisture as a defect that needs a proper repair, not a maintenance nuisance to monitor.
Using the wrong repair materials
Tape and putty are not universal fixes. Thread seal tape belongs on threaded metal connections, not on slip nuts with rubber washers. Plumber’s putty works for some drain flanges but is wrong for others that need silicone. Using the wrong product can create a leak that lasts longer than the original.
Skipping the water shutoff
Working on a supply line with the valve open invites a spray to the face and a flooded cabinet. Always close the stops and open the faucet to release pressure before you loosen anything. If the valve will not close, shut off the main.
Forgetting the disposal and dishwasher
Many people check the trap and supply lines but overlook the garbage disposal housing and the dishwasher hose connection. Both leak and both sit in the same cabinet. Include them in every inspection.
Not drying and monitoring after the fix
A repaired joint can still weep. After any repair, dry the area completely, then check again after a day of normal use. Skipping this step hides a failed fix until the damage is done.
If water is emerging from the wall behind the cabinet or the floor beneath it, stop. That points to a pipe inside the structure, which requires a plumber rather than a DIY repair.
Takeaway: slow down, find the real source, use the correct parts, and verify the repair before you call it done.
FAQ
How much does it cost to fix a leak under sink?
Many under-sink leaks are cheap to fix. A washer or gasket may cost a few dollars, and a new P-trap or supply hose is a modest expense. A plumber’s visit adds a service call fee on top. Structural water damage or a pipe inside the wall pushes costs much higher, so early repair protects your budget.
Can I just put a bucket under the leak for now?
A bucket catches water but does not stop the leak. Moisture still raises humidity in the cabinet, which encourages mold and warps the board. Use a bucket only as short-term containment while you arrange a proper repair, and empty it often.
How do I know if the leak is from the supply line or the drain?
Dry all the pipes, then watch without running water. If moisture reappears, the supply side is leaking. If it stays dry, run the tap for 30 seconds and check again. Moisture that appears only during use points to the drain.
Should I call a plumber or fix it myself?
Loose fittings, worn washers, and a replaceable P-trap are reasonable DIY jobs for a careful homeowner. Call a plumber if water comes from the wall or floor, if a valve is seized, or if you cannot find the source after a thorough check.
How often should I check under the sink?
Every few months is a sensible rhythm, plus a quick look after any plumbing work or a cold snap. Homes with older pipes or high water pressure benefit from more frequent checks.
Conclusion
A leak under sink is rarely just a minor annoyance. It is an early warning about worn parts, and the real cost lies in the water damage and mold that follow if you ignore it. The pattern is consistent: most leaks start at supply fittings, traps, or drain flanges, and routine checks catch them while they are still inexpensive to fix.
Your next step is simple. Open the cabinet under each sink today, dry everything, and watch for moisture while you run the tap. Fix what you find, replace any stiff or aging hoses, and keep a small kit within reach. That one inspection habit will protect your cabinets, your floor, and your budget for years.
