

Leaking Shower Valve: Causes, Fixes, and When to Call a Plumber
A dripping sound behind the shower wall at 2 a.m. is usually the first clue. By morning, you may notice a water stain on the ceiling below or a soft patch of drywall. If you suspect a leaking shower valve, you are probably wondering whether this is a weekend DIY job or a call to a professional.
Quick answer: Shut off the water supply to the shower before doing anything else. Most leaks come from a worn cartridge, O-ring, or seat, and replacing those small parts fixes the problem in many cases. If water is escaping behind the wall or the valve body itself is cracked, call a licensed plumber.
This article explains what a leaking shower valve is, why it matters, the best repair practices, and the mistakes that turn a small drip into expensive water damage. You will finish with a clear idea of what to check and when to stop and get help.
What is leaking shower valve?
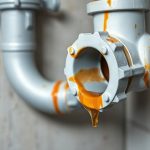
A leaking shower valve is a failure in the mixing valve assembly that controls water flow and temperature in your shower. That assembly sits behind the handle and connects the hot and cold supply lines to the showerhead. When a seal, cartridge, or internal component wears out, water escapes where it should not.
Leaks show up in two main ways. The visible kind drips from the spout or showerhead when the valve is off. The hidden kind seeps behind the wall, around the trim plate, or under the floor. The second type is far more serious because you may not notice it for weeks.
The parts inside a shower valve
Most residential shower valves contain a handful of wear items:
- Cartridge: A single-unit mixing mechanism common in modern single-handle showers. It controls temperature and flow together.
- O-rings and seals: Rubber rings that keep water inside the valve body. They harden and crack with age.
- Valve seats: The surfaces the cartridge presses against to stop flow.
- Valve body: The brass housing that holds everything together. It rarely fails but is expensive to replace.
Older two-handle showers often use compression washers and stems instead of cartridges. The repair approach differs, but the principle is the same: a worn soft part stops sealing properly.
Common causes of a leaking shower valve
Age and mineral buildup cause most failures. Rubber seals lose flexibility over years of hot water cycling. Hard water deposits calcium around moving parts, which scores surfaces and creates gaps. High water pressure accelerates wear on every component.
Improper installation is another frequent cause. A cartridge pushed in at an angle, missing lubricant on O-rings, or a misaligned trim plate all create leaks. Temperature extremes make it worse; a valve that freezes in winter can crack internally.
How to tell where the leak is coming from
Start with the shower off and dry the area completely. Watch for drips at the showerhead, the spout, or around the handle. Then check the ceiling below the bathroom and the wall behind the valve. A leak that only appears when the water runs points to a supply-side seal. A drip that continues when the valve is closed points to the cartridge or seat.
[!INSIGHT] Hidden leaks often show up as a musty smell or peeling paint on the opposite side of the wall before any water is visible. Check those surfaces whenever you investigate a drip.
Takeaway: identify whether the leak is visible or hidden first, because that single detail decides whether you reach for a screwdriver or a phone.
Why a leaking shower valve matters
Ignoring a dripping shower valve costs more than most homeowners expect. A steady drip wastes water continuously, and that adds up on every utility bill. Small leaks also erode the parts around them, so a cheap cartridge replacement today can become a valve body replacement later.
Water damage behind the wall
The wall cavity around a shower holds insulation, wood framing, and often electrical wiring. Slow leaks soak these materials without any obvious sign. Wood framing softens and rots, drywall crumbles, and mold can establish itself in damp insulation within days. Repairing structural water damage typically costs far more than any valve repair.
Higher water bills and wasted resources
Even a modest drip runs day and night. A leak that fills a cup in an hour adds up to several gallons a day, and thousands of gallons over a year. Hot-water leaks cost twice, because you pay to heat the water as well as supply it. Fixing the valve usually pays for itself quickly.
Damage to surrounding finishes
Water travels along the path of least resistance. It can stain ceilings on the floor below, bubble paint, loosen tile adhesive, and warp vanity cabinets in adjacent rooms. Each of these fixes adds to the total bill. A timely repair keeps the damage to the valve itself.
Comparison: visible drip vs. hidden leak
| Factor | Visible drip | Hidden leak |
|---|---|---|
| Detection | Immediate | Often delayed by weeks |
| Typical cause | Cartridge or seat wear | Failed seal or cracked body |
| Repair cost | Low to moderate | Higher, plus water damage |
| Urgency | Fix within days | Address immediately |
Notice that the hidden leak is worse in every row despite often starting smaller. Detection speed drives the final cost.
[!WARNING] Water near wiring is a safety hazard. If you see moisture around an electrical outlet or light fixture below the bathroom, turn off the circuit at the breaker and call a professional.
Takeaway: treat every shower valve leak as urgent, because the hidden damage almost always outweighs the cost of the repair.
Best practices
Handle the repair in a deliberate order. Rushing to remove the cartridge before shutting off water properly is how bathrooms get flooded. These practices keep the job controlled and the results durable.
Shut off and verify the water supply
Find the shutoff valves behind the access panel or turn off the main supply. Open the shower handle afterward to release pressure and confirm the water is truly off. A little residual water will drain; a steady stream means you have the wrong valve. Label the shutoffs for next time.
Identify the valve brand and model first
Cartridges are brand-specific and often model-specific. Take a photo of the valve body and any markings before buying parts. Bring the old cartridge to the store if you are unsure. Matching the exact part saves a second trip and prevents a poor fit that leaks again.
Replace wear parts as a set
If the cartridge is worn, the O-rings and seats around it are likely worn too. Replace them together rather than one at a time. Coat new rubber parts with plumber’s grease so they seat without binding. Inspect the inside of the valve body for scratches and mineral scale, and clean it gently.
Test under pressure before closing the wall
Reassemble the valve, turn the water back on slowly, and watch for drips at the handle and spout for several minutes. Run hot and cold water and check the temperature response. Only close up an access panel or patch drywall after a dry test.
Turning the water back on gradually gives you time to spot a leak at the fitting before pressure builds. A sudden full-open can spray water across the room.
A clean, methodical repair usually lasts a decade or more. Sloppy work tends to fail within months.
Takeaway: identify the exact part, replace related wear items together, and pressure-test before you seal anything up.
Common mistakes to avoid
Most failed shower valve repairs trace back to a handful of avoidable errors. Knowing them in advance can save you a second disassembly or a call to a plumber.
Forcing stuck parts
An old cartridge can seize inside the valve body. Prying hard with a screwdriver can crack the brass housing, turning a simple job into a full valve replacement. Use the correct removal tool for your brand and apply steady pressure. Soaking with a penetrating product helps loosen mineral bonds.
Skipping the water shutoff check
Starting work before confirming the supply is off is the fastest route to a soaked bathroom. Always test the handle after shutting off. Close the drain so small parts do not disappear down it.
Mixing up hot and cold lines
Reversed supply lines cause temperature surprises and can damage some cartridges. Mark the lines before disconnecting anything. Take a photo of the orientation before you pull the old part out.
Over-tightening or under-tightening
Too much torque cracks plastic cartridges and distorts seals. Too little leaves gaps that drip. Follow the manufacturer’s instructions on torque and use hand pressure plus a quarter turn. Lubricating O-rings reduces the force needed.
Ignoring the valve body condition
If the inside of the valve body is scratched, pitted, or heavily scaled, a new cartridge may still leak. Check the seating surfaces before reassembly. A damaged body means replacing the whole valve, which is a bigger job but the only lasting fix.
Covering up a leak too soon
Patching drywall over a slow leak hides the problem instead of solving it. Always run water and observe for several minutes before closing the wall.
[!NOTE] Age and water quality change the calculation. In a home with hard water and a valve over 15 years old, replacing the entire valve often makes more sense than chasing repeated cartridge failures.
Takeaway: patience with stuck parts, correct part orientation, and proper torque prevent nearly every repeat repair.
FAQ
How much does it cost to fix a leaking shower valve?
A replacement cartridge and seals often cost between $20 and $80 in parts. A plumber typically charges for a service call plus labor, which varies widely by region. Hidden leaks that require drywall repair add significantly to the total cost.
Can I fix a leaking shower valve myself?
Many single-handle cartridge replacements are manageable for a careful DIYer. You need the right removal tool and the exact replacement part. If the valve body is damaged or the leak is behind the wall, hire a licensed plumber.
How long can I wait before repairing a dripping valve?
Treat a visible drip as a days-not-weeks problem. A leak behind the wall deserves same-day attention because water damage compounds quickly. Waiting rarely makes the repair cheaper.
Why does my shower valve leak only when the water is on?
That pattern usually points to a worn O-ring or a loose connection on the supply side. A leak that continues when the valve is closed is more often the cartridge or seat. The distinction helps you target the right part.
Should I replace the whole valve or just the cartridge?
Replace the cartridge first if the valve body is clean and undamaged. Choose a full valve replacement when the body is cracked, heavily scaled, or very old. A plumber can confirm which option fits your situation.
Conclusion
A leaking shower valve is usually a small worn part, but the consequences reach well beyond a drip. Cartridge wear, hardened seals, and mineral buildup cause most leaks, and hidden water damage drives the real cost. Shut off the water, identify the exact valve model, replace related wear parts together, and test under pressure before closing the wall. Skip the shortcuts that crack valve bodies or hide slow leaks.
If you have confirmed the leak and feel confident with basic tools, start by photographing the valve and sourcing the correct cartridge. If water is escaping behind the wall or the valve body looks damaged, call a licensed plumber today rather than waiting for the ceiling to stain.
