


Compact Power Tools Guide: Featuring G LAXIA Mini Circular Saw
Small workshops, apartment garages, and on-the-go job sites all share the same challenge: limited space, limited setup time, and zero patience for bulky gear. Compact power tools solve that problem by delivering “big tool” results with less weight, less footprint, and often less intimidation—especially when the goal is cleaner cuts, faster assembly, and safer handling in tight areas.
If you want a practical starting point, focus on beginner-friendly tools that help you measure, cut, drill, and finish without demanding a full-sized shop or years of experience.
This guide breaks down what compact power tools do best, how to choose them, and how to work smarter with mini woodworking tools—while spotlighting the G LAXIA Mini Circular Saw as a high-utility option for quick, controlled cutting.
Why compact power tools matter
Compact tools don’t just “save space.” They change how you work.
They reduce friction in your workflow
When a tool feels heavy, awkward, or overpowered for the task, people skip steps—like clamping, dust control, or test cuts. Smaller tools make it easier to follow best practices because they feel manageable from the first use.
They fit real-world workspaces
Not everyone has an outfeed table, a dedicated cutting station, or room to break down sheet goods. Compact saws, sanders, and drills help you build in places like:
- A balcony workshop
- A spare room
- A shared garage bay
- A small shed with limited outlets
They support “right-sized” projects
Many DIY and repair tasks simply don’t require full-size equipment. Trim work, small shelving, hobby builds, and quick repairs often benefit from mini woodworking tools that emphasize control.
What counts as a compact power tool?
A compact power tool typically has at least two of these traits:
- Smaller body and shorter overall length
- Reduced weight for one-handed or low-fatigue use
- Lower power draw or smaller battery platform
- Designed for tighter cuts, smaller stock, or short-run jobs
Compact doesn’t mean “weak.” It means purpose-built.
Compact vs. full-size: how to decide
Choose compact tools when you prioritize:
- Portability
- Ease of handling
- Quick setup
- Light-to-medium materials
- High control in tight spaces
Choose full-size tools when you consistently need:
- Deep cutting capacity
- Long duty cycles
- High torque for dense materials
- Production-level repeatability
The core compact toolkit (and what each tool does)
If the goal is a small but capable setup, build around a few multi-purpose tools instead of collecting specialty tools too early.
1) Compact drill/driver (the “every project” tool)
A compact drill/driver earns its place immediately:
- Pre-drilling reduces splitting
- Driving screws speeds assembly
- With the right bits, it handles hinges, hardware, and pilot holes
Buying tips (industry standard approach):
- Look for multiple speed settings and a clutch
- Prioritize comfortable grip and balance over peak torque
- Buy quality bits; they matter as much as the tool
2) Oscillating multi-tool (the problem solver)
This tool shines where other tools struggle:
- Flush cuts in trim
- Notch adjustments
- Removing old caulk, grout, or adhesive
- Sanding in corners
A compact multi-tool often replaces several hand tools for repair work.
3) Random orbital sander (finishing made fast)
A compact sander improves results more than most beginners expect:
- Smooths surfaces quickly
- Reduces visible scratch patterns (with correct grit progression)
- Preps paint and stain more evenly
Pro tip (recommended by professionals): Use dust extraction whenever possible and change paper before it “looks done.” Dull paper burns time and heats wood.
4) Compact jigsaw (curves and cutouts)
When projects need curves, circles, or interior cutouts, the jigsaw becomes the safe, compact choice:
- Sink cutouts
- Rounded shelf corners
- Template rough-outs
5) Mini circular saw (fast straight cuts in a small package)
A mini circular saw bridges a common gap: you need straighter cuts than a jigsaw, but a full-size circular saw feels oversized for the job.
That’s where the featured tool comes in.
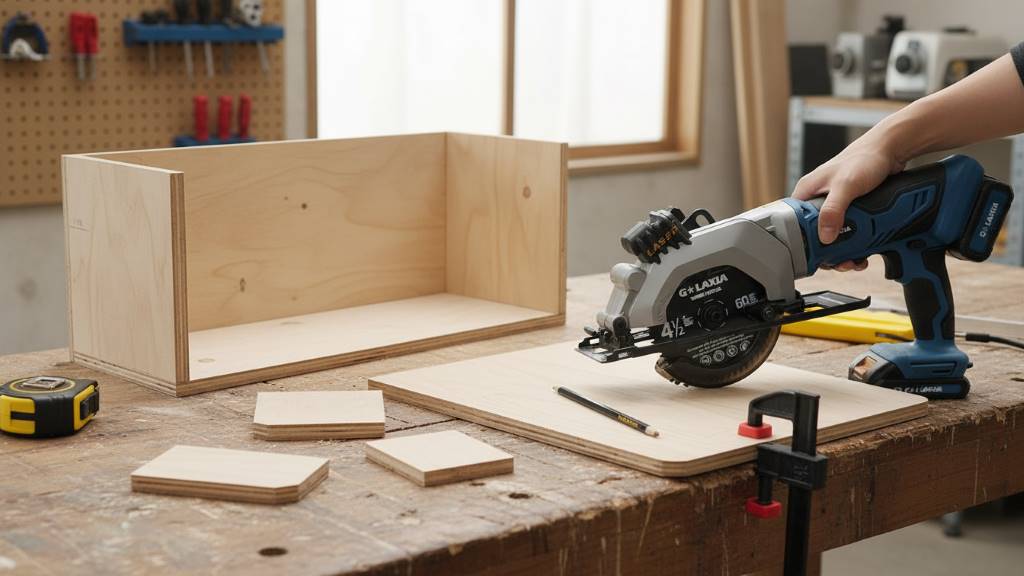
Spotlight: G LAXIA Mini Circular Saw (what makes it useful)
A mini circular saw succeeds when it delivers three things: controllability, adequate cutting capacity for common materials, and repeatable accuracy features.
Based on widely available product-style descriptions and tool reviewers’ summaries, the G LAXIA Mini Circular Saw commonly highlights features such as:
- No-load speed around 3,400 RPM for efficient cutting
- Compact, lightweight design for reduced fatigue
- Laser guide support for visual alignment
- Rip guide support for repeatable straight cuts
- Safety-focused switching (often described as a dual-protection style)
- A vacuum/dust adapter option to help manage debris
- Typical mini-saw cutting capacities in the neighborhood of about 1-11/16 inch at 90° and about 1-1/8 inch at 45° (values vary by configuration and blade)
These are the kinds of specs that matter in day-to-day DIY work because they translate into smoother control and more predictable results.
What a mini circular saw does best
Use a compact saw like this for:
- Cutting plywood panels into smaller parts (short runs)
- Trimming boards to length
- Quick flooring underlayment cuts
- DIY shelving parts
- Straight cuts where a jigsaw would wander
What it does not replace
According to widely accepted industry standards, mini circular saws don’t replace:
- A table saw for repeated, identical rips
- A miter saw for fast, repeatable crosscuts with consistent angles
- A track saw for ultra-clean, long precision cuts in sheet goods
But as a compact option, it fills a real need: straight, controlled cutting without hauling larger equipment.
Choosing blades for mini circular saw success
The blade you use often matters more than the saw.
Match tooth count to the cut
As recommended by professionals:
- Use a lower tooth count for faster rough cutting in construction lumber
- Use a higher tooth count for cleaner cuts in plywood and veneers
Pick the right blade type
For mini woodworking tools, keep a small “blade set” on hand:
- General-purpose wood blade (everyday cuts)
- Fine-finish blade for plywood
- Specialty blade (only if needed) for materials like tile or thin non-ferrous stock (follow manufacturer guidelines)
Don’t ignore blade condition
Dull blades cause:
- Burn marks
- Tear-out
- Wandering cuts
- More kickback risk due to forcing the tool
Safe setup: compact tool habits that prevent accidents
Compact tools feel less intimidating, but they can still hurt you quickly. Follow these safety practices consistently.
The “secure, support, clear” checklist
Before every cut:
- Secure the workpiece (clamps beat “one hand holding” every time)
- Support both sides of the cut to reduce binding
- Clear the cord/battery area and ensure the off-hand stays away from the blade path
Depth setting: the overlooked safety win
Based on common manufacturer guidance for circular saws, set blade depth so it extends only slightly below the material. This reduces exposed blade and helps control.
Watch for binding and kickback conditions
According to industry experts, kickback risk rises when:
- The cut closes behind the blade
- The work sags as you finish the cut
- You force the tool through knots or dense spots
Move slowly and keep steady forward pressure—especially with a mini circular saw, which can drift if rushed.
Related:
Compact Cordless Circular Saws vs. Full-Size Models – Which Powers Your Next Project?
How to Build a Metal Roof Covered Patio
How to get straighter cuts with compact saws
Precision doesn’t require a giant shop. It requires repeatable technique.
Use a straight-edge guide (simple and effective)
A straight board or level clamped as a guide can dramatically improve accuracy. Pair it with the saw’s rip guide when possible for repeat cuts.
Mark correctly: lines you can actually follow
For clean layouts:
- Mark with a sharp pencil or knife line
- Identify the waste side clearly
- Make a short test cut on scrap when the cut matters
Control tear-out on plywood
To reduce splintering:
- Use a fine-tooth blade
- Apply painter’s tape over the cut line
- Cut with the “good face” oriented to minimize visible tear-out (direction depends on blade rotation; test on scrap)
Practical projects that suit compact power tools
Want to build confidence fast? Pick projects that reward careful measuring and straight cuts.
Great starter builds
- Floating shelves (simple cuts, big payoff)
- Small planter boxes
- Storage crates
- Laptop stand
- Simple shoe rack
Why these work well
They teach the fundamentals:
- Measuring and marking
- Repeating cuts consistently
- Sanding and finishing
- Basic joinery (screws, glue, brackets)
They also suit mini woodworking tools because parts stay manageable and don’t require huge cutting capacity.
Tool buying checklist (avoid regret purchases)
When people buy compact tools, they sometimes over-focus on size and ignore usability. Use this checklist.
Comfort and control (most important)
As recommended by professionals:
- Choose tools that feel balanced in your hand
- Confirm you can reach switches safely without awkward grips
- Avoid tools that force wrist strain during normal use
Accuracy features (second most important)
Look for:
- Stable base plate/shoe
- Clear markings
- Compatible guides (rip guide, edge guide, etc.)
- Minimal wobble in adjustments
Dust management (often ignored, always appreciated)
Even a basic vacuum adapter helps keep lines visible and improves cleanup—especially in indoor workspaces.
FAQs
Is a mini circular saw good for beginners?
Yes—many beginners find a mini circular saw easier to control than a full-size model because it weighs less and feels less bulky, but it still requires strict safety habits and proper clamping.
What can the G LAXIA Mini Circular Saw cut?
It typically handles common DIY materials like plywood, boards, and trim work effectively, and many listings describe cutting depths around 1-11/16 inch at 90° and about 1-1/8 inch at 45° depending on setup and blade choice.
Can a mini circular saw replace a jigsaw?
Not fully. Use a mini circular saw for straight cuts and a jigsaw for curves, cutouts, and interior openings.
How do you get clean cuts in plywood with compact saws?
Use a fine-tooth blade, support the sheet well to prevent sagging, and use a straight-edge guide; also reduce tear-out with tape or by dialing in the correct “good face” orientation after a test cut.
Do compact tools last as long as full-size tools?
They can, if you follow manufacturer guidelines, avoid overheating through continuous heavy cutting, keep blades/bits sharp, and store tools properly. Compact tools often excel in intermittent DIY use rather than production cycles.
What are the most important safety steps for mini circular saws?
Wear eye protection, keep hands out of the blade path, clamp the workpiece, set correct blade depth, and prevent binding by supporting both sides of the cut.
Conclusion
Compact tools let you build real projects without waiting for the “perfect” shop setup, and a mini circular saw can become the fastest path to cleaner, straighter cuts in small spaces. Start with a focused toolkit, learn the safety fundamentals, and practice accuracy with guides and smart blade choices. If the next project needs portable straight-cut power without the bulk, put the G LAXIA-style mini circular saw category at the top of the shortlist—and commit to building skill through small, repeatable wins.
References: