


How to Stop Toilet Seat from Cracking After Install
Nothing is more frustrating than installing a new toilet seat only to discover cracks appearing within weeks or months. This common household problem affects countless homeowners who invest time and money into bathroom improvements. At Think House Creative, we understand the importance of proper installation techniques that ensure long-lasting results.
Toilet seat cracking typically occurs due to improper installation methods, overtightening of bolts, or using incompatible materials. However, with the right approach and understanding of common mistakes, you can prevent this issue entirely. The key lies in understanding proper installation techniques and ongoing maintenance practices.
When you learn how to install toilet seat components correctly, you significantly reduce the risk of premature cracking and extend the lifespan of your bathroom fixtures. This comprehensive guide will walk you through proven prevention methods and troubleshooting techniques.
Understanding Why Toilet Seats Crack
Toilet seats crack for several reasons, most of which are preventable with proper knowledge and technique. The most common cause involves excessive stress placed on the seat during installation or regular use. When bolts are overtightened, they create pressure points that weaken the seat material over time.
Temperature fluctuations also contribute to cracking issues. Plastic and wooden seats expand and contract with temperature changes, creating stress points where cracks eventually develop. Additionally, poor-quality materials or manufacturing defects can make seats more susceptible to damage.
Weight distribution plays a crucial role in seat longevity. When seats are not properly aligned or supported, uneven weight distribution creates weak points that lead to cracks. Understanding these factors helps you make better installation decisions and avoid common pitfalls.
Choosing the Right Toilet Seat Material
Material selection significantly impacts crack prevention and overall durability. Plastic seats offer affordability and easy maintenance but may be more prone to cracking under stress. High-quality plastic seats with reinforced construction provide better crack resistance than basic models.
Wooden toilet seats provide excellent durability and aesthetic appeal. However, they require proper sealing and maintenance to prevent moisture-related cracking. Solid wood seats generally offer better crack resistance than particleboard or MDF alternatives.
Composite materials represent a middle ground between plastic and wood options. These engineered materials often incorporate fiberglass or other reinforcing agents that improve crack resistance. When selecting materials, consider your budget, maintenance preferences, and expected usage patterns.
Essential Tools and Preparation
Proper preparation prevents installation problems that lead to cracking issues. Start by gathering the necessary tools: adjustable wrenches, screwdrivers, measuring tape, and level. Having the right tools ensures you can complete the installation without forcing components or creating stress points.
Clean the toilet bowl rim thoroughly before installation. Remove any debris, old adhesive, or mineral deposits that could prevent proper seat alignment. A clean installation surface ensures even contact and reduces stress concentration points.
Measure your toilet bowl carefully to ensure proper seat fit. Standard round and elongated bowls require different seat sizes, and using the wrong size creates installation stress that leads to cracking. Take measurements at the widest points and compare them to manufacturer specifications.
Step-by-Step Installation Process
Begin installation by positioning the seat hinges over the bolt holes. Ensure the seat sits flush against the toilet bowl rim without gaps or uneven contact points. Gaps create stress concentrations that can lead to cracking over time.
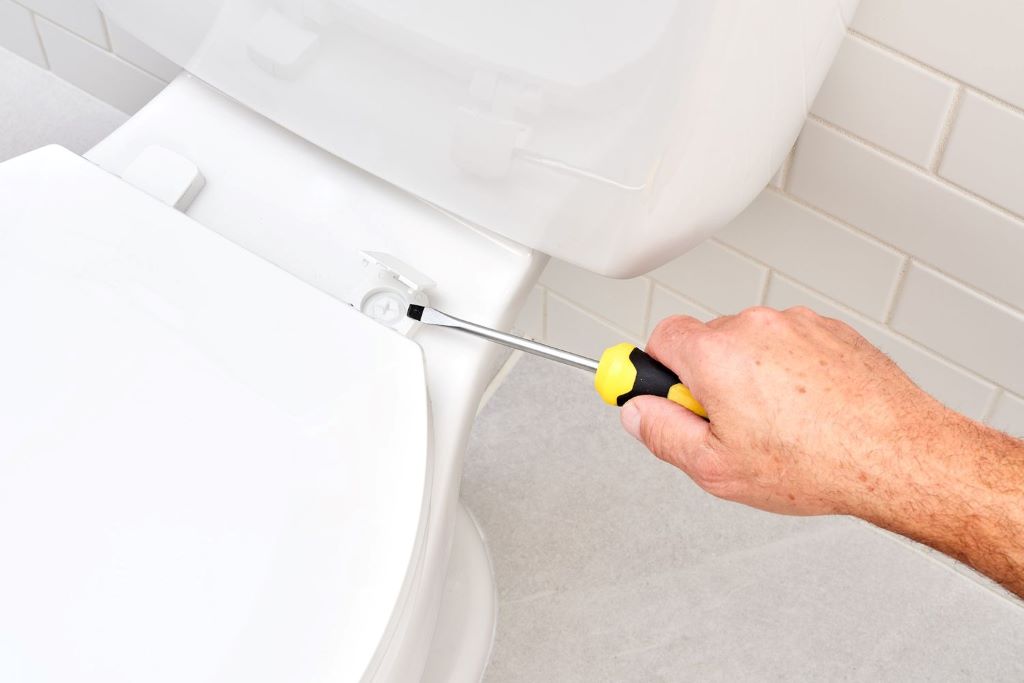
Insert the mounting bolts through the hinges and toilet holes. Start threading the nuts by hand to avoid cross-threading, which can create uneven pressure distribution. Hand-tightening initially prevents overtightening during the final adjustment phase.
Use a wrench to tighten the nuts gradually and evenly. The key to preventing cracks is achieving snug tightness without overtightening. The seat should feel secure but not under excessive stress. Test the tightness by gently lifting and lowering the seat to ensure smooth operation.

Proper Tightening Techniques
Overtightening represents the most common cause of toilet seat cracking. Many homeowners believe tighter is better, but excessive pressure creates stress points that weaken the seat material. The goal is achieving secure attachment without creating damaging pressure.
Use a hand-tight plus quarter-turn approach for most installations. This technique provides adequate security while avoiding excessive stress. For plastic seats, err on the side of slightly looser rather than too tight, as plastic is more susceptible to stress cracking.
Check tightness periodically after installation. Normal use can cause bolts to loosen slightly, but avoid the temptation to overtighten during adjustments. Instead, make small incremental adjustments until you achieve the proper balance between security and stress prevention.
Avoiding Common Installation Mistakes
Misalignment during installation creates uneven stress distribution that leads to cracking. Take time to ensure the seat is properly centered and aligned with the toilet bowl. Small alignment errors compound over time and create weak points where cracks develop.
Using the wrong hardware can cause installation problems and subsequent cracking. Always use the hardware provided with your toilet seat, as it’s designed for that specific model. Substituting different bolts or washers can create compatibility issues that stress the seat material.
Forcing components during installation indicates a problem that needs addressing. If parts don’t fit easily, stop and identify the issue rather than applying force. Forced installations create immediate stress that often results in cracking within a short time period.
Maintenance Tips for Crack Prevention
Regular inspection helps identify potential problems before they become major issues. Check mounting bolts monthly for looseness, but avoid overtightening when making adjustments. Look for small stress cracks that might indicate developing problems.
Clean your toilet seat regularly with appropriate cleaners. Harsh chemicals can weaken seat materials and make them more susceptible to cracking. Use mild cleaners and avoid abrasive scrubbing that can create surface stress points.
Lubricate hinges periodically with appropriate lubricants. Smooth hinge operation reduces stress on the seat during normal use. Sticky or binding hinges create additional stress that can contribute to cracking over time.
Troubleshooting Existing Cracks
Small cracks can sometimes be repaired before they become major problems. For plastic seats, specialized plastic repair kits can fill and reinforce minor cracks. However, evaluate whether repair costs justify replacement with a higher-quality seat.
Wooden seat cracks often respond well to wood filler and refinishing techniques. Sand the crack area lightly, apply appropriate wood filler, and refinish to match the original surface. This approach works best for minor cosmetic cracks rather than structural damage.
Consider replacement when cracks compromise structural integrity or continue expanding despite repair attempts. Multiple cracks or large structural cracks typically indicate that replacement is more cost-effective than continued repair efforts.
When to Consider Professional Help
Complex installations or recurring crack problems may warrant professional assistance. Plumbers have experience with various toilet models and can identify installation issues that homeowners might miss. Professional installation often includes warranties that protect your investment.
Structural issues with the toilet itself can cause repeated seat cracking problems. If multiple seats crack in the same location, the toilet bowl or mounting points may have problems requiring professional evaluation. Attempting DIY repairs on structural issues often makes problems worse.
Accessibility concerns or physical limitations may make professional installation the safer choice. Proper installation requires some physical dexterity and strength, and professional help ensures the job is done correctly without personal injury risk.
Conclusion
Preventing toilet seat cracking after installation requires understanding proper techniques, selecting appropriate materials, and maintaining your installation over time. The key factors include avoiding overtightening, ensuring proper alignment, and using quality materials suited to your specific needs.
Regular maintenance and inspection help identify potential problems before they become costly replacements. When you follow proper installation procedures and maintain your toilet seat correctly, you can expect years of trouble-free use without cracking issues.
Remember that quality materials and proper installation techniques represent investments in long-term satisfaction and reduced maintenance costs. Taking time to do the job right initially saves money and frustration over the life of your bathroom fixtures.
Frequently Asked Questions
How tight should toilet seat bolts be? Toilet seat bolts should be hand-tight plus approximately one-quarter turn with a wrench. The seat should feel secure without excessive pressure that could cause cracking. Test by gently lifting the seat to ensure it doesn’t move but isn’t under stress.
What causes plastic toilet seats to crack? Plastic toilet seats typically crack due to overtightening during installation, temperature fluctuations, poor-quality materials, or uneven weight distribution. Avoiding these factors significantly reduces cracking risk and extends seat life.
Can cracked toilet seats be repaired? Small cracks in plastic seats can sometimes be repaired with plastic repair kits, while wooden seats may respond to wood filler and refinishing. However, structural cracks or multiple cracks usually indicate replacement is more cost-effective.
How often should toilet seat bolts be checked? Check toilet seat bolt tightness monthly during regular cleaning. Look for looseness or movement, but avoid overtightening when making adjustments. Small incremental adjustments maintain security without creating damaging stress.
What’s the best material for crack-resistant toilet seats? High-quality plastic with reinforced construction, solid wood with proper sealing, or composite materials with reinforcing agents offer the best crack resistance. Avoid cheap plastic or particleboard options that are more prone to cracking issues.
Read More: